BASIC DISK UTILITIES.......
by Jerry White
When you compare Atari's DOS to the old DOS 1, you will find the new DOS to have advantages and disadvantages. On the positive side, bugs in the first version have been corrected. The latest version requires less RAM because it's utility package is loaded only when the DOS command is issued. A big disadvantage will be noticed at this time.
The utilities will be loaded into your program area unless you have a MEM.SAV file. If you use the MEM.SAV option, it will take about 30 seconds to delete the prior MEM.SAV file, save the current program area, and load the DOS utilities (DUP.SYS.)
Many of these utilities can be accessed much faster by using small Basic routines. These routines can be stored on your work diskettes and called in using the ENTER command. Each of these Basic utilities begins at line 32000. Entering them will not disturb your program in RAM as long as it does not use the same line numbers. I intend to supply ANALOG readers with other useful routines. The lowest line number will be 30000. Keep this in mind as you write your programs. just use line numbers from 0 through 29999.
These routines must be listed onto disk. Do not use the SAVE command. We will use single letter file names which correspond to the similar DOS options except for the letter B. For example, we use the DOS option A for a disk directory. The A routine will be listed onto the diskette using the following command: LIST"D:A". To use the A routine, type ENTER"D:A" and return. Then type GOTO 32000 and return.
Each routine has been kept as short as possible so that it can be used quickly, require very little memory, and very little room on your disk. User input must be entered properly since there is no error trapping. You could add error trapping but I have found this to be unnecessary. If you do make a mistake, it is simple enough to start over by typing GOTO 32000.
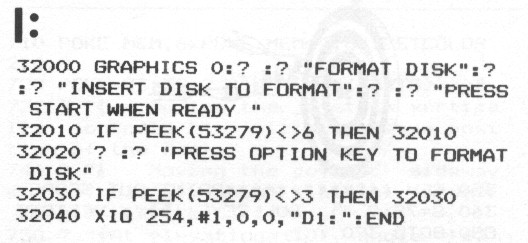
The B routine is used as a reminder menu of the Basic utility options available. The D, E, F, G and I routines do just what the corresponding DOS options do. The user input to these routines via keyboard is slightly different.
When using the D, F and G options, you must specify the disk drive to be used. For example, to delete a file called test from drive 1, you would type D:TEST. If that file were to be deleted from drive 2, the command would be D2:TEST. LOCK and UNLOCK (F and G) work the same way.
When using the RENAME and FORMAT DISK (E and I) routines, drive 1 is assumed. To rename that TEST file to TEST10, you would simply type TEST, TEST10.
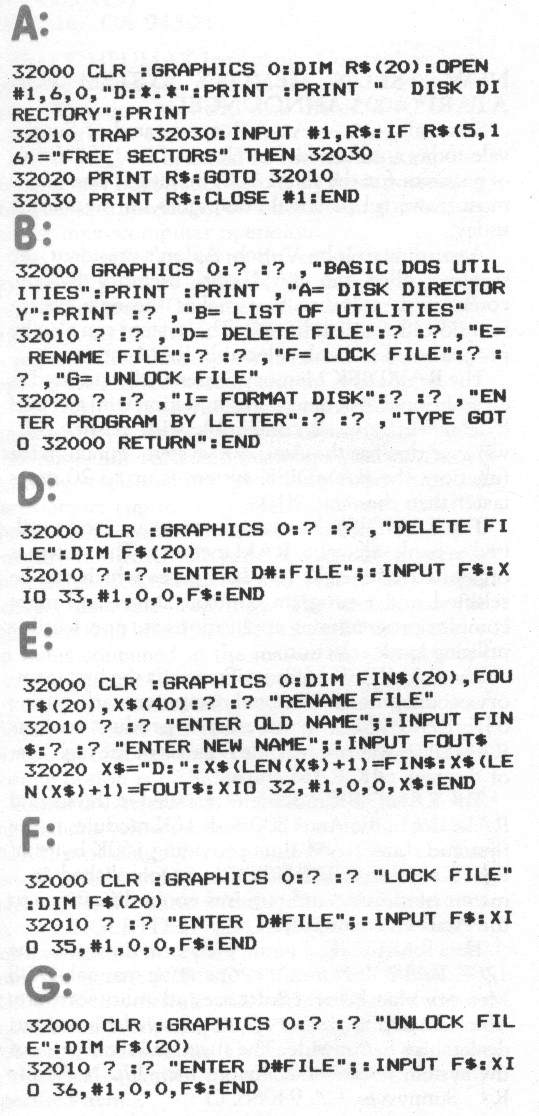
Study these little programs. They demonstrate only a few of the many uses of the X10 command. The A routine will show you how to access the disk directory by opening the directory file with the operand 6.
Using these Basic programs instead of DOS will save you time and eliminate the possibility of losing a program in memory by calling DOS. You can call in one of these routines after another since the ENTER command causes identical line numbers to overlay new over old. You need not delete one before using another.
Having done more than a little Atari Basic programming during the past year,
I can tell you that these Basic utilities will come in very handy. I only wish I
had thought of this idea sooner.