One of the nicest features available on ATARI computer is the custom character
generation capability. The method for creating your own graphics by altering the
character set is relatively easy. Once the method is know, you can create
professional looking programs and really WOW them at user group meetings. The
purpose of this article then is to give the bare facts on how to change the
existing character set and then provide a demonstration program utilizing an
altered set. I know you're saying "There has to be a catch!!" Well ...
The only difficult portion of the operation is deciding which characters or
graphics you want to create and then converting these shapes to numbers the
computer will understand. ARRRRRGGG!!! the cries of anguish!! Converting
numbers... I knew there was a hitch!! As Robert Stack would say (who's he??)
"Don't worry ... We've got you covered!!" Just follow me as I discuss
the method to greater graphics.
THE METHOD
The method can be summed up in one sentence ... (feel free to take notes) ... Take the existing character set, move it to a place where you can access it, overlay the old character information with your new information and then tell the computer where the new character set is located. That's all there is to it. In conclusion, I hope I have provided you with ... (ONLY KIDDING!!!). There is just a little bit (no pun intended) more information required to accomplish these tasks so let's dive in and start. creating!!
BACKGROUND INFO
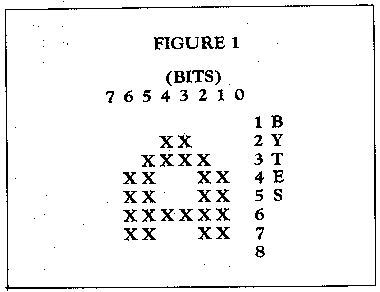
Each letter or graphics character consists of little pixels arranged in an 8x8 grid. To make the character appear the pixels are turned on or off. The letter A for example looks like figure one in its pixel form.

As you can see there are 8 bits per Byte (numbered 0-7) and there are 8 Bytes for each character. Some quick math tells us that if there 128 characters available and each has 8 bytes then the character set takes up 1024 bytes of ROM. Now if one page of memory has 256 bytes then 1024/256=4 pages of memory. The term page shouldn't scare you, just remember that the 6502 uses paging and each page consists of 256 BYTES. Remember the 4 as we will use it shortly. Now let's take a look at 1 BYTE to see how it is broken down. Figure 2 shows one BYTE and the decimal values of each bit when that bit is set or turned on.

The decimal value for each BYTE is obtained by adding the values of all the "SET BITS" together. If all BITS were set, then the value for that BYTE would be 128+64+32+16+8+4+2+1 or 255 decimal. If bits 0, 1, and 2 were set then the value would be 4+2+1 or 7 decimal. I hope I haven't got you lost yet. I know this may seem trivial to some of you pros but for others this may be new. Anyway, armed with this information, we will now create a character and determine the values for each BYTE. When creating characters, I use graph paper broken into 8x8 squares. If LEE is nice he will include a piece in this magazine so you can copy it. If you're into GREEK or CYRYLLIC, go ahead and create those characters. I never was so I'll show you how to make a little invader character. I took the graph paper and filled in the BITS I wanted to set to produce my invader. He looks like figure 3.

|
CALCULATIONS |
VALUE | |
| 128 | = | 128 |
|
64+2 |
= | 66 |
|
32+4+1 |
= | 37 |
|
32+16+8+4 |
= | 60 |
|
64+16+4+2 |
= | 86 |
|
128+64+32+16+8+4+2+1 |
= | 255 |
|
64+2 |
= | 66 |
|
128+64+4+2 |
= | 198 |
There we have a little invader and the calculations that go behind making him appear. Go ahead and create more characters if you wish. Up to this point I've gone into a fair amount of detail on what makes up a character. What do we do with them after they are created? Go take a break, enjoy your favorite beverage. When you return, I'll demonstrate the method of putting your characters into the computer.
AFTER THE BREAK READING
Well, now we have our characters ready and are ready to alter the existing set. If you remember from the first part of THE METHOD, we have to move the existing character set to a safe place in RAM. OH ... almost forgot ... WE have to know how the existing character set is stored, i.e. the order that the characters have in memory. After all how can we change existing characters if we don't know how they are stored? If we look at the ATASCII CHARACTER SET (Appendix C) we can see the ATASCII values of all the characters available. This, unfortunately, is not the way they are stored in memory. For this information we have to look at Page 55 of the Basic Reference manual Table 9.6. Now what?? Decide which characters you want to substitute and find their ATASCII value in Appendix C. Use the following conversion to find the memory location of the characters you have chosen.
1) If ATASCII VALUE= 0.31 then MEM= (A.VALUE+64)*8+DLIST
2) If ATASCII VALUE=32-95 then MEM= (A.VALUE+32)*8+DLIST
3) If ATASCII VALUE=96-127 then MEM= A.VALUE*8+DLIST
DLIST=Start location of character set
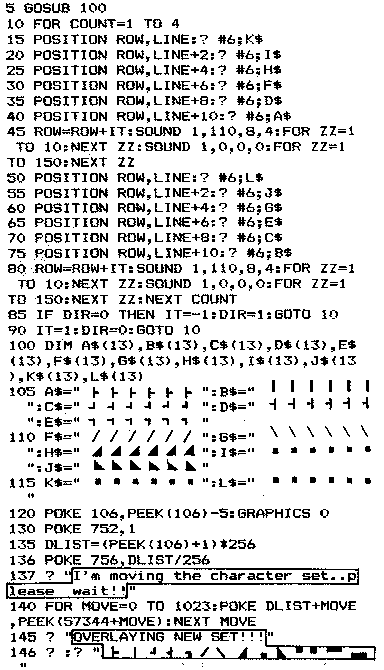
We multiply by 8 because there are 8 bytes for each character. OK!! Enough talk, time for an example. I've created an invaders character set for a demo. If you follow along with listing 1, I'll go through each step of THE METHOD. HERE WE GO!!!
STEP 1
Take the existing character set and move it to a place in memory where we can access it.
To do this we must protect some memory so that BASIC will not interfere with our character set. Line 120 does this for us. Remember way back we said we needed 4 pages of memory? Well this is where it comes in. Location 106 is used by the operating system to determine how many pages of memory are available for use by BASIC. We can always reduce this number and fool the operating system. That's what line 120 does. I've reduced the number in location 106 by 5 pages (just to be safe). Executing the graphics statement causes the operating system to partially reinitialize but now we have 5 pages of memory for our use!!
Line 135 determines the decimal starting address of where we will transfer the old character set from ROM. We saved 5 pages but want to leave a safety buffer for our 4 page character set hence the + 1.
Now let's move the ROM set to our saved area. This is done in line 140. The ROM set starts at location 56344. The move loop takes the ROM set and pokes it into our save area starting at DUST (calculated in line 135).
STEP 2
Overlay the old character information with your new character information.
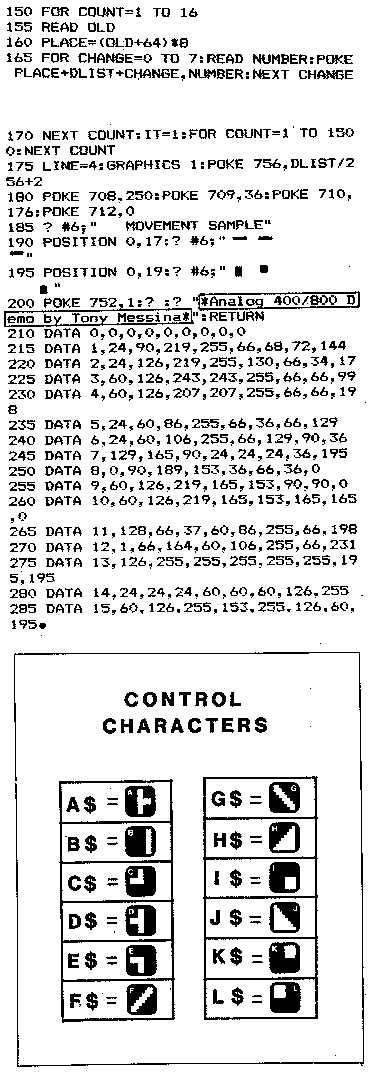
Lines 200-285 contain the DATA statements for each invader I created. The first number in each statement, however is the ATASCII VALUE of the character I want the DATA substituted for. I want to substitute 16 characters so LINE 150 sets up a loop for this. LINE 155 reads the ATASCII VALUE and LINE 160 determines the offset in memory value where I will store the information that follows. I decided to replace the first 16 graphic characters (CNTRL Comma-0) with my invaders. This would still leave me with all the letters for text use. LINE 160 then is the conversion routine I mentioned previously (The one for ATASCII VALUES 0-31. LINE 165 overlays my new data by reading each number and poking it into the appropriate memory location.
STEP 3
Tell the computer where the new character set is located. I cheated in the DEMO. LINE 136 POKES location 756 with the location of DLIST/256. I did this so that you could see the characters being overlayed when you run the DEMO. Location 756 is the HIGH ORDER BYTE pointer, thus we divide DUST by 256. The rest of the DEMO deals with moving the characters around on the screen and producing the marching noise of the invaders.
FINAL
NOTES
When you run the demo you'll notice that I used Graphics Mode 1. The invaders
show up better. LINE 175 creates the Graphics Mode 1 screen. Notice also, that
we RE-POKED location 756 with DLIST/256+2. If you look at TABLE 9.7 on page 56
of the BASIC REF. Manual, you'll see why. Our characters fall under the
conversion 3 category so we must Poke 756 with DLIST/256+2. WHAT??? OK, in the
table you see POKE 756,226. To the left you see POKE 756,224. 224+2=226 RIGHT?
Well, those numbers refer to the existing character set.

