Welcome back, all of you End Users. One thing that's undoubtedly true about this great Atari adventure that we've all embarked on is that, regardless of who we are, we're all End Users. Therfore, we share a common need to learn to get the most out of our Atari computers. That's why we're here.
This month, the column is devoted to discussing how to take pictures of your video monitor or television... and a very brief mention of a book that you may find interesting reading.
Since July of 1984, Jack Tramiel and his three sons have owned Atari - and have held our collective fate in their hands. At the Winter Consumer Electronics Show, an impressive line of new computers was unveiled. Tramiel and sons are betting that these machines will make Atari profitable in 1985, also making it the number one low-end computer maker.
If Jack Tramiel is able to pull off the big turnaround for Atari, I predict that he will be a candidate for Time magazine's Man of the Year Award. We'll have to wait and see what happens. But, in the meantime, there is a book you ought to be aware of.
Described as a "benevolent dictator," there is no question that Jack Tramiel is a brilliant, controversial businessman. In order to learn more about the man and the future of Atari, I highly recommend that you read Home Computer Wars by Michael Tomczyk. Published by COMPUTE! Books (at $15 hardcover, $10 softcover), this account of the man who just may be the greatest name in the microcomputer business makes fascinating reading.
There's nothing quite like the satisfaction of creating your own graphics programs. Seeing the results on the video screen is a pleasure that can only be truly appreciated after spending many long hours writing and debugging the code. But there's one hassle.
In order for you to share your colorful creations with friends and family, you must boot up your system and have everyone gather around the tube. Others may not be totally impressed with your creation, as they squint to see it on the small screen. And your Atari system isn't that portable.
What's the solution? Why, take a picture of the screen. Then, matte finish 3-by-5-inch prints can be mailed like postcards, and slides can be shown onto a projection screen. What a thrill! Here's how you do it.
There are a few things you need to take pictures of your television or monitor screen: a camera, a tripod and some film. Just about any camera will work, but the best results come from a single-lens reflex (SLR) type, with a lens between 50 and 100mm. With an SLR, less guesswork is required to obtain excellent shots, because what you see is what you get.
A tripod provides a steady support for the camera. Normally, most people cannot hand hold a camera when using a shutter speed of 1/60 second or slower. When photographing a screen, I normally use a 1/2 second shutter speed.
If you don't have a tripod, an improvised camera support like a chair or table will do fine. To avoid bumping the camera while the shutter is open, it's best to have an inexpensive (about $3) shutter release cable. If your camera has a self-timer, you can use that in place of the cable release.
Finally, you'll need some film. For slides, I generally use Kodachrome 64. For prints, I use Kodacolor 100. It doesn't have to be Kodak film, but the ASA film speeds of 64 and 100 are important. Now for the fun part.
Line up your camera so that the back of the camera is parallel with the front of the TV or monitor. With a 50mm lens, the camera will probably need to be about two to three feet from the screen. Make sure that the lens is pointed at the center of the screen.
With the image that you're going to photograph on the screen, adjust the TV or monitor controls for the best possible picture. Get the color and tint balanced first, then adjust the brightness, and finally, use the contrast control for the crispest image you can get.
Now, set the camera to an f-stop of 5.6. This will be the aperture setting that you'll always use. Any variation in the exposure will be done by adjusting the shutter speed.
Each marking on the shutter speed dial is either one-half or twice the previous marking, so it's easy to use and understand. Initially, set the shutter speed to 1/4 second.
Focus the camera lens and adjust the distance from the camera to the screen., so that you can see two inches on all sides of the video screen. This is important, because, when the pictures are developed, part of the photo around the edges is lost.
To take the picture, turn off all the lights in the room and press the cable release. If you are using a self-timer, you might want to activate it first, then turn off all the room lights until the shot is completed.
If this is your first time taking pictures off of your screen, it would be wise to bracket your shots. To bracket your shot, take two additional pictures with everything exactly the same except the shutter speed. Take one shot at 1/8 second (a little faster) and another shot at 1/2 second (a little slower). These two settings will allow the film to receive less light and more light, respectively.
If you're using print film, it is imperative that you tell whoever is doing the developing that you have CRT shots. If you forget to do this, I can tell you from experience that your prints will come back with washed out, often strange-looking colors.
The automatic printing machines that film processors use are designed to adjust the color balance as if you were taking pictures of sunsets and the family dog. This is understandable, since 95 percent of what they process is just this type of snapshot. Slide film is not as critical, but it would not hurt to tell the developer that you have CRT shots.
Another decision you have to make is whether to have matte or glossy prints made. If you plan to send them as postcards or handle them a lot, order matte finish. It's more resistant to fingerprints and will not scratch as easily.
On the other hand, if you want the sharpest looking print, or if you're sending prints to a magazine for publication, choose glossy finish. Be sure to handle the prints carefully, along the edges if possible.
I usually use 1/2 second shutter speed for slides and 1/8 for prints. But you'll have to experiment with various exposures until you find the right speed.
A good approach is to shoot a roll of film as a test roll. Use different shutter speeds and be sure to keep a record of each exposure. Then, when your film comes back, pick out the best shot, determine what exposure was used, and you'll be all set. You can continue to use these same settings as long as you don't change the contrast and brightness controls on your TV or monitor.
There are dozens of reasons why you will want to take pictures of your TV or monitor screen. Here are just a few.
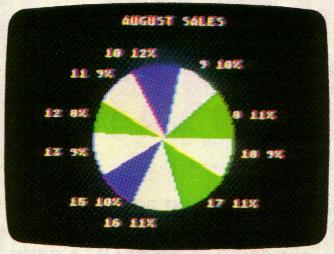
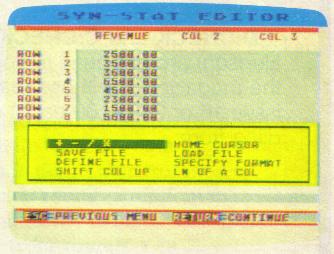
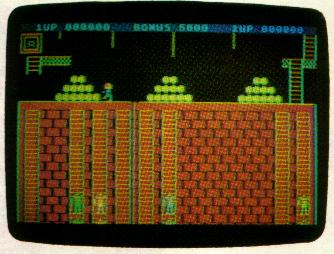
How about capturing that high score that you'll want to show friends - or send to a software company for patches or other prizes? Maybe you'd like to take a picture of your special graphics creation. Whether from a touch tablet, BASIC program or light pen, saving pictures is fun.
Screen shots often look quite nice when enlarged to 5x7 or 8x10-inch size. Matting and framing these make them into very attractive wall hangings, perfect for original, creative gift giving.
Regardless of what you do with your screen shots, if you follow these simple instructions and experiment a little, I think you'll be pleasantly surprised with the results. And so will your friends and family. Happy shooting!
Next month: control a robot with your Atari computer!